
How to make a homemade tattoo machine?
To get a tattoo on your body, you do not have to buy an expensive machine or seek help from a professional tattoo parlor.
This equipment can be made at home with little effort.
If you look back in history, you can see that the first tattooing device was made by Samuel O'Reilly, who took elements from the equipment for copying documents as a basis to reproduce the reciprocating movements of an electric typewriter.
Initially, it is necessary to prepare all the necessary parts that will make up the future product. For this you will need:
- helium or ballpoint pen;
- the thinnest string 15 centimeters long;
- motor and bushing, which can be removed from the tape recorder or purchased on the radio market;
- small plastic tube.
For the translational movement of the needle, you need to find a gear that can be taken from the same tape recorder. Its diameter should correspond to the size of the engine shaft. This is necessary so that the gear fits snugly on the shaft and cannot rotate. The final component of the product is an energy source that will create a voltage of 3-5V. To do this, you can use a regular power supply.
Before making a homemade tattoo machine, you need to squeeze a ball out of the paste. The paste itself will serve as a guide for the needle. We push the string through the paste shaft. In the event that the string cannot pass through the small hole in the rod, you can cut off the rounded part in the place where the ball was previously located. You can also sharpen the string slightly to make it easier to pass through the handle. Before doing this, you need to make sure that the size of the string matches the length of the rod.
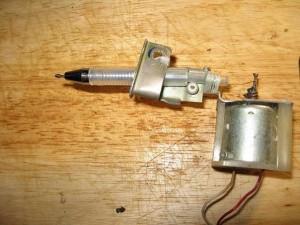
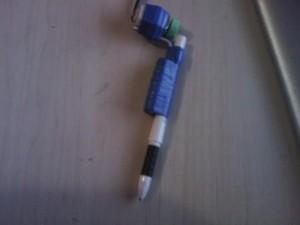
Then we take a plastic tube and bend it over low heat so that an angle of 90 degrees is obtained. We attach the engine on one side of the tube, and the handle on the opposite side. You can fix it with electrical tape. When this stage is completed, it is necessary fasten the string to the bushing... To do this, a loop is made in advance at the end of the string, which must correspond to the diameter of the sleeve.
The loop must be made so that it is not tightly tightened, but, at the same time, does not dangle freely on the bushing. Using a soldering machine, the sleeve is soldered to the gear. In doing so, the correct distance from the sleeve to the center of the shaft must be maintained. This directly affects the depth of the needle entry into the skin.
It is also necessary to take into account that the smaller the gear is selected and the closer the sleeve is to the center, the more blows will be applied. By moving the handle towards the motor, you can adjust the speed of the blows. If you want to correctly make a homemade tattoo machine, the assembly video will be a good visual aid.
To check the resulting product in operation, you must first prepare a solution based on black ink. To get a more accurate drawing, the sketch of the tattoo is first applied to the skin with a regular pen. During tattooing, there is no need to rush to press the needle against the body so that it can drive enough paint. If an even black cut remains on the body after the machine, then the machine is working properly. Before applying the tattoo, it is imperative to treat all parts of the machine with alcohol so as not to infect the skin under the skin.
Making a tattoo machine yourself, of course, significantly reduces financial costs. However, it is worth taking into account the disadvantages of such a solution. Making a tattoo yourself with such a machine is not very convenient. The process itself can be accompanied by unpleasant sensations. This, in turn, can be reflected in the quality of the picture.
Asb black
It's really cool